Tips To A Successful Worm Compost Bin
Solid waste in Kenya continues to rise at a steady rate. According to The Ministry of Environment and Forestry,
Kenya generates an estimated 22,000 tons of waste per day. This figure is estimated to reach about 5.5 million tons annually, factoring in the current population growth rate.
40% of this waste is generated in Urban Areas and
60 – 70% of all waste is organic waste (biodegradable)
This waste mostly ends up in landfills, producing toxic gases as it breaks down. Whilst there have been some impressive efforts to recycle this waste by the private sector, there is still much more to be done. Given that most of this waste comes from the household level, it would be best if each household could participate in the waste separation and recycling of organic waste.
Most households are constrained by space. As such, there is a need for solutions that would be economically viable in small areas and considerate of the time and effort required. Vermicomposting, aka Worm Farming, is one possible method that can be used to recycle organic kitchen and garden waste.
Worm composting is an excellent way to reduce food waste while creating nutrient-rich soil for your plants. But starting a worm bin can be daunting, especially if you’ve never done it. Luckily, we’re here to help. This blog post will share some tips to get you started on your journey to successful worm composting at home.
What is worm composting?
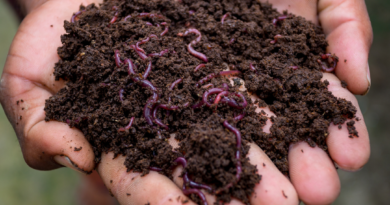
Worm composting, also known as vermicomposting, breaks down organic waste into nutrient-rich compost using worms. It’s an eco-friendly way to reduce food waste while generating valuable compost for your garden.
Worms can break down organic matter much more efficiently than other compost methods, such as using bacteria or fungi. They have a specialized digestive system that can break down complex organic molecules.
The process of worm composting is relatively simple. You just need to set up a worm bin and add food scraps and other organic matter. The worms will do the rest, turning the waste into nutrient-rich compost.
There are many benefits to worm composting, including the following:
• reducing your food waste
• generating nutrient-rich compost for your garden
• being eco-friendly
• being easy to set up and maintain
Why should you compost with worms?
Worm composting is a great option if you’re looking for a way to compost your kitchen scraps and other organic matter. Worms eat organic matter and convert it into rich, nutrient-dense compost that can be used to improve your soil. Here are some reasons why you should consider composting with worms:
1. It’s efficient – Worms can eat their weight in food scraps daily, so you can quickly turn your kitchen waste into valuable compost.
2. It’s earth-friendly – Worm composting is a great way to reduce your environmental impact. Because worms eat organic matter, they help to break down complex materials like food waste and yard waste, which would otherwise end up in a landfill.
3. It’s easy – Worm composting is relatively easy to set up and maintain, especially compared to other composting systems. Once you have your system set up, all you need to do is add food scraps and bedding material (like shredded newspaper or cardboard) to the bin and let the worms do their work!
4. It’s fun – Composting with worms can be a fun and rewarding experience. Watching the worms turn your kitchen waste into helpful compost is both satisfying and educational. Plus, kids love getting involved in worm composting!
The benefits of worm composting.
Worm composting is an excellent way to recycle food waste and create a nutrient-rich soil amendment for your garden. Here are some of the benefits of worm composting:
1. It’s easy and low-maintenance.
Worm composting is a simple process that doesn’t require much time or effort. Once you have your worm bin set up, all you need to do is add food scraps and bedding material, and the worms will do the rest.
2. It’s environmentally friendly.
Worm composting helps reduce landfill waste and the emissions of decomposing organic matter in landfills. By recycling your food waste, you’re also reducing the demand for new agricultural products (like fertilizer), which can have a significant environmental impact.
3. It produces high-quality compost.
Worm compost is nutrient-rich and perfect for gardens and potting soil mixes. This “black gold” can improve plant growth and health while also helping to reduce watering needs.
4. It’s excellent for indoor or outdoor spaces.
Worm bins can be set up indoors or outdoors, making them a versatile option for small spaces or larger yards. If you live in an apartment or condo, indoor worm composting is a great way to go!
How to start worm composting at home
Assuming you’ve never done worm composting before, here is a basic overview of what you need to do to get started:
1. You will need a container – this can be anything from a plastic tub to an old aquarium. Make sure it has drainage holes in the bottom.
2. Add bedding material to the container. This can be shredded newspaper, coconut coir, or composted leaves. The bedding should be moist but not soggy.
3. Add worms to the container. You can purchase these from a bait shop or online retailer specializing in vermicomposting supplies.
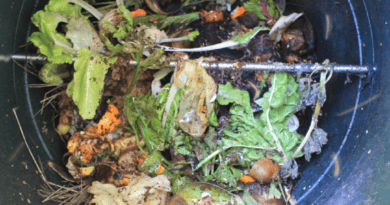
4. Feed your worms food scraps! They will eat just about anything organic – fruit and vegetable scraps, coffee grounds, eggshells, etc. Avoid meat, dairy, and oily/greasy foods, as these can cause odour problems and attract pests.
5. Keep an eye on your worm bin and ensure it is not too wet or too dry – add more bedding if it seems too wet or more water if it looks too dry.
What kind of worms should you use for composting?
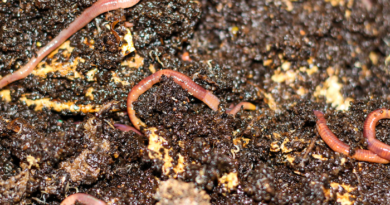
Assuming you are referring to earthworms, red wigglers are recommended for composting. They are more tolerant of temperature extremes and different types of organic matter than other earthworm species. They also reproduce quicker, so you will have a constant supply of worms for your composting needs.
What kind of bin should you use for worm composting?
There are a few things to consider when choosing a bin for worm composting. The size of the worm bin will depend on how much food waste you have and how many worms you want to compost. A larger worm bin will require more maintenance but will be able to process more food waste. The material of the worm bin is also vital to consider. A plastic bin will retain heat better than a wooden bin, which can benefit colder climates. Ensure the worm bin has plenty of ventilation holes to allow oxygen to circulate and keep the worms healthy.
What bedding should you use for worm composting?
The type of bedding you use for worm composting is essential for the health of your worms and the success of your compost. Here are a few tips for choosing the best bedding for your worm compost:
1. Avoid using chemically treated or dyed materials, as these can harm your worms.
2. Shredded newspaper, cardboard, or coconut coir make good bedding choices.
3. You will need to add additional bedding material every few months as it breaks down.
4. Keep your bedding moist but not wet, as worms need a moist environment to thrive.
5. Add food scraps and other organic matter to your bedding regularly to keep your worms fed and happy.
How to feed your worms
Assuming you’ve already started your worm bin (see our guide on creating a worm bin), it’s time to start feeding your worms. Here are some tips on how to do so:
1. Feed them food scraps: Your worms will love feasting on fruit and vegetable scraps, coffee grounds, tea leaves, and more. Avoid anything too greasy, spicy, or acidic.
2. Chop up their food: This will help your worms digest their food more efficiently.
3. Introduce new foods gradually: When adding fresh foods to your worm bin, do so slowly to give the worms time to adjust.
4. Don’t overfeed them: You don’t want to end up with a smelly worm bin full of rotting food. Add only as much food as the worms can consume in a week or two.
5. Keep an eye on the moisture level: Too much or too little moisture can harm your worms. Add water if the bin is too dry or drainage material if it’s too wet.
How to harvest your worm compost
Assuming you have already set up your worm bin, it’s time to start harvesting your worm compost! Here are a few tips to get the most out of your worms:
1. The first thing you want to do is stop feeding your worms for a few weeks. This will help them to digest all the organic matter in the bin, resulting in more finished compost.
2. You’ll want to slowly remove all the bedding material from the bin. Be careful not to disturb the worms too much, as they will be burrowed into the bedding.
3. Once all the bedding is removed, you should see a nice black layer of compost at the bottom of the bin. This is what you’ll be harvesting!
4. To harvest the compost, scoop it out with a shovel or garden tool. You can then use it in your garden or wherever you see fit!
Common Challenges
1. Common Challenges:
Worm composting can be a great way to reduce household waste and provide rich nutrients for your plants. However, there are a few challenges that you may face when starting out. Here are some tips to overcome common worm composting challenges:
Temperature:
Worms are sensitive to temperature changes and prefer cooler temperatures. If your worm bin is too hot, the worms will migrate to the cooler edges of the worm bin or may even die. To keep your worm bin at a comfortable temperature for worms, place it in a cool, dark location such as a basement or garage. You can also add water or insulate the worm bin with newspapers or other materials to help regulate the temperature.
Moisture:
Another critical factor for worm health is moisture levels. Worms need moist conditions to survive, but too much moisture will cause them to drown. Add enough water to keep the bin moist but not wet, and add drainage holes if needed. You can also cover the worm bin with a lid or towel to help retain moisture levels.
Odours:
If not appropriately managed, worm bins can smell bad due to the decomposing food scraps. To avoid odours, add plenty of bedding material, such as shredded newspaper or coconut coir. This will help absorb any excess moisture and smells. Additionally, make sure you’re adding food scraps in small amounts so they don’t start to rot before the worms.
Using and Storing The Vermicompost
Assuming you have followed all of the tips in the previous sections and set up your worm bin, it is time to start using and storing your vermicompost. Here are a few tips to help you get the most out of your worm composting:
-When using vermicompost on plants, mix it well with the existing soil. Vermicompost is very concentrated and can burn plants if used too heavily.
-If you are storing vermicompost for later use, keep it moist (but not wet). If it dries out, it will lose many of its nutrients.
-Vermicompost can be stored in a cool, dark place for several months. However, it is best to use it within a few weeks for the best results.


